A Photographer's Guide to Exploring Canyons
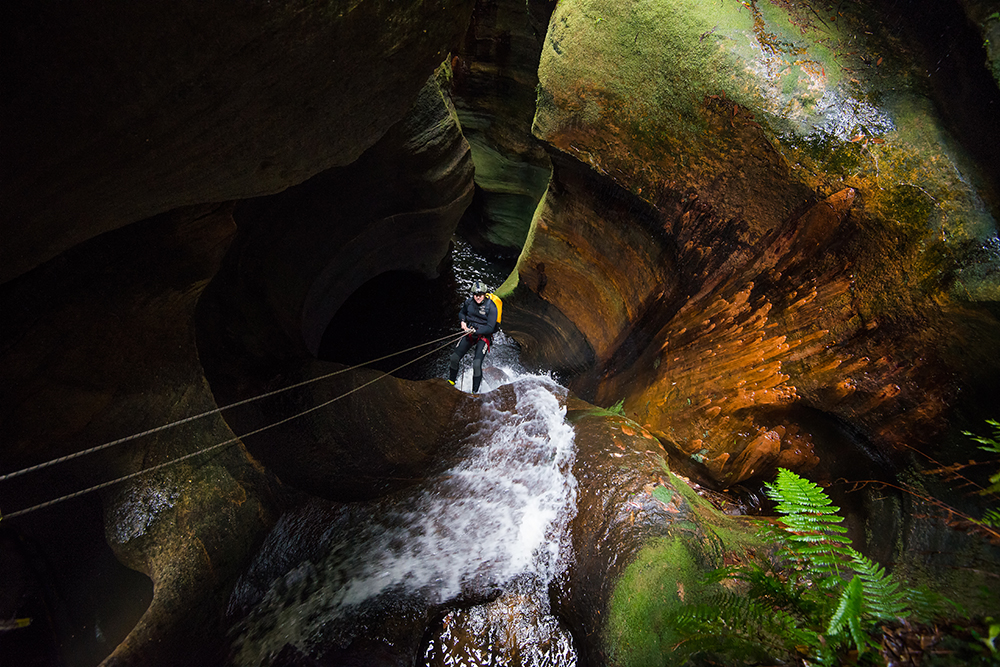
Imagine walking between two cliffs both 80 meters high and only a few meters apart. Within these walls are stories of erosion, gouges and scoops out of the cliff where water once traversed around stray boulders. Emerald light filtering through ferns growing out of cracks in the sides. Mist rising up out of cold deep pools. It's like the world grew up around these places, leaving them stuck in time, untouched compared to the escarpments above.
The thing I love most is that they hide in plain sight. My favourite canyons cairn it on the side of a major highway, yet the percentage of people that drive past it everyday that know about it would be close to zero. I grew up in the Blue Mountains just west of Sydney, so I've had this as a playground my entire life. I was lucky enough to become really good friends with Dylan Jones, owner of Blue Mountains Adventure Company. What has transpired from that has shaped a lot of what I'm about photographically and morally. I was taught to respect these places and honour sustainability, because they’re for us all to use. I was also taught to understand ropes, from anchors to self rescue techniques.
I remember the first shot of the first canyon I’d ever seen, one that I now regard as my favourite. I remember walking past it in a news agency, I'd gone in to buy a snowboarding mag and this shot stopped me dead. It was cover for National Geographic. I took it home only to discover that these shots were from my own backyard. That was the day I decided to fully commit myself to learning the art of canyon photography.
Getting in there
These places are always easy to find and then hard to get into.
If you don't have a good grasp on abseiling then you really need to go with someone who does or pay a guide company. The abseils into a lot of these canyons are tricky enough with experience, wet rocks and running water can really make things a bit difficult - take it from me, I've had a few knocks.
If you're going in with mates you will need wetsuits, the sunlight barely reaches the bottom of these canyons, this makes the water freezing! I'm not exaggerating. It's cold!
You need to study the track notes back to front and have a emergency plan -i.e. plb, inform people of your location, plan and estimated time frame. I cannot stress how dangerous these places can be.
Another essential is a number of dry bags, I like to take multiple cameras with appropriate lens (I'll explain why later). I double wrap my cameras in two dry bags, and many people actually triple wrap. If you have a waterproof housing then that's even better.
Gear wise
I always take two cameras into the canyons. One with my 16-35mm and the other with my 50mm f1.4. The reason I take two DSLRs is that with the cold water my body is always producing steam and I don’t want to risk getting moisture in my camera. A good wide angle will get you through 90% of canyons, especially if it stops down to 2.8 (Nikon’s 17-35mm would be killer). I also sneak in a Nikon AW1 from time to time, this little ripper is waterproof so it's just fun to have.
I’m known for carrying around a huge tripod, it's just a personal thing about movement, any tripod would be fine but important to have. You don't need to suffer like I do. Sometimes I take a polarising filter but again not exactly necessary. Then of course there's abseiling gear, food and water.
The important bit
Shooting in these places can be tricky, there's intense beams of light and almost completely dark shadows so a lot of the time the dynamic range is through the roof.
A lot of my bigger shots are all exposure blends of about 5 shots, I take a shot for the shadows and then down to my highlights and blend in post. I lot of shots will be 5+ images. If there’s breeze in the canyon and things like ferns are moving around then I will also take my f-stop right down to f4 in the 16mms case and then take individual images for sections of ferns and focus stack them later. Sometimes the ISO even has to be bumped up to get a shot with no motion blur.
I use the same technique for my big people shots, I'll take all my frames to stop everything down so the shutter speed won't show any movement -can normally get away with a 60th of a second if the person is deep in the shot. I will then blend the person back into the shot in post. These shots are taken off a tripod so set up and pack up can be time-consuming
Where time is an issue, I will set one of my cameras to Shutter priority and auto ISO with a cap of 5000ish, the 50mm f1.4 is normally the set up I'll do this for, as it's the camera I'll have ready to snap anything and the f1.4 means the ISO won't race up to 5000 to much.
It took a long time for me to produce anything half decent - these are tricky places to shoot in, and sometimes you just don't get any good light. The moment you get something you're happy with will be the moment you're hooked. Happy shooting!
Written by Jake Anderson. See more of Jake's photography and adventures on Instagram: @jakeandersonphotography


